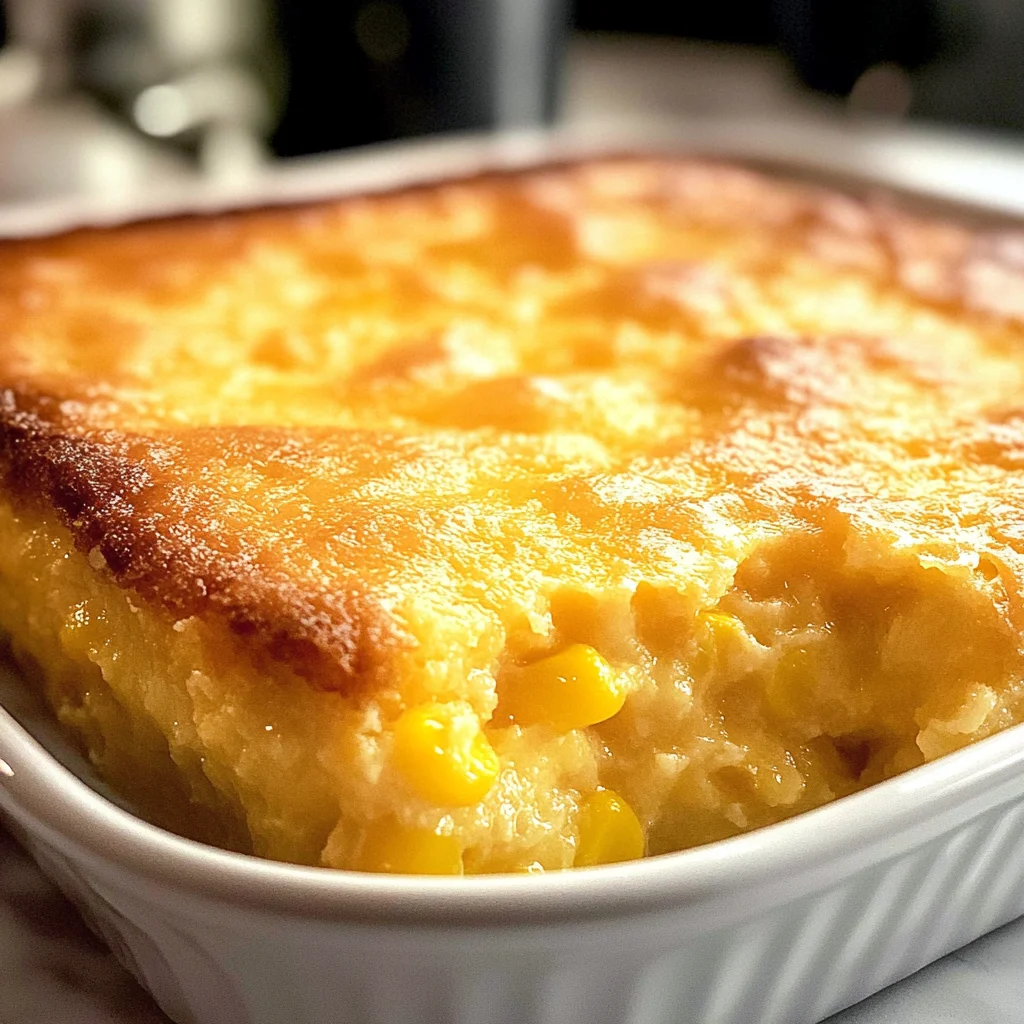
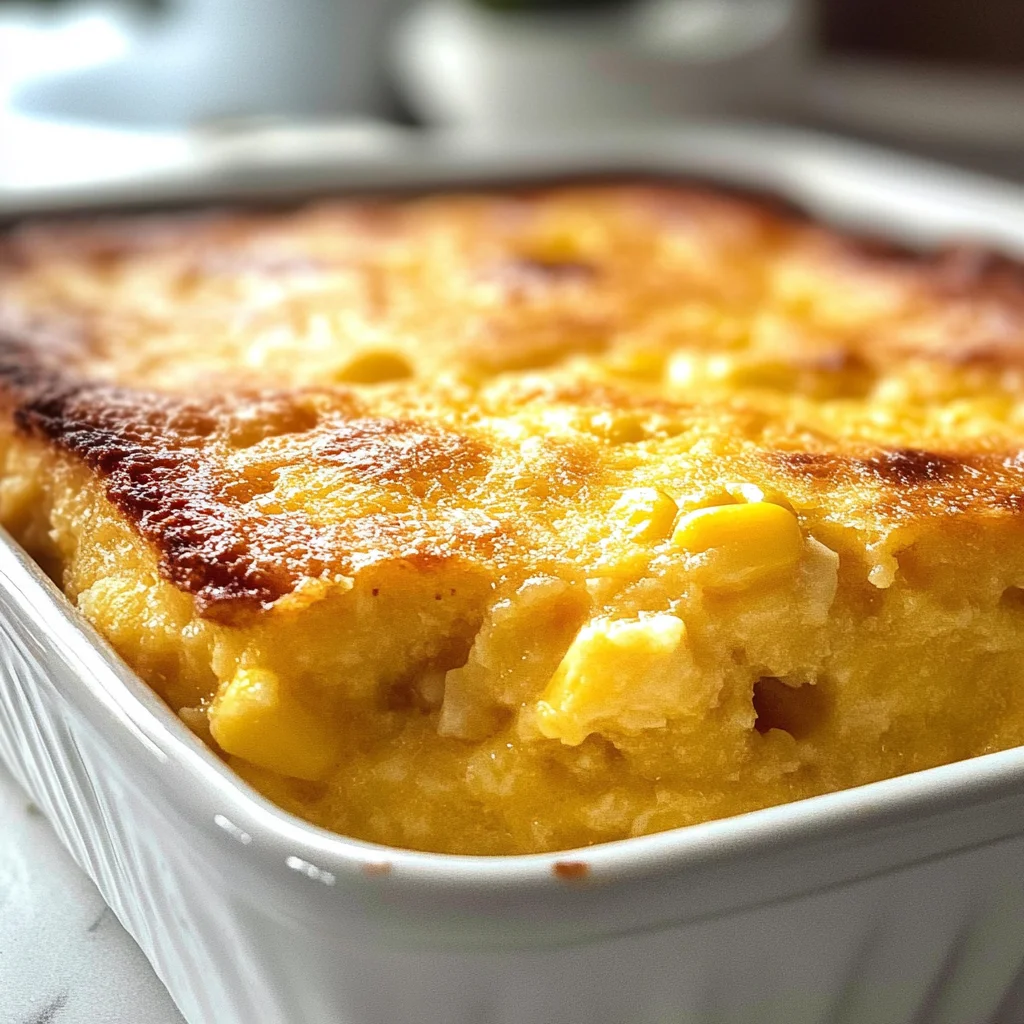
If you’re looking for a dish that feels like a warm hug, this Corn Pudding Casserole is just the ticket! With its golden top and soft, creamy center, it’s the kind of recipe that brings everyone to the table. Whether it’s a busy weeknight or a special family gathering, this casserole shines bright as both a side dish and a comforting main attraction.
What makes this corn pudding casserole so special? It’s not just the delightful blend of sweet and buttery flavors; it’s also how easy it is to whip up. You’ll find yourself making it again and again, delighting friends and family with every bite!
Why You’ll Love This Recipe
- Super easy to prepare: With just five minutes of prep time, you can have this dish ready for the oven in no time!
- Family-friendly flavor: Everyone loves the sweetness of corn, making this casserole a hit with kids and adults alike.
- Make-ahead convenience: Prepare it in advance and pop it in the oven when you’re ready. Perfect for busy days!
- Versatile side dish: Pair it with almost any meal—grilled chicken, roasted veggies, or even on its own.
- Comfort food perfection: The combination of textures—from creamy to slightly crispy—is simply irresistible!
Ingredients You’ll Need
Gathering your ingredients for this Corn Pudding Casserole couldn’t be simpler! These wholesome items come together to create a deliciously comforting dish. Here’s what you’ll need:
For the Casserole
- 1 ½ cups frozen sweet corn (defrosted and drained)
- 2 cans creamed corn (or homemade creamed corn)
- 1 cup cornmeal
- ½ cup gluten-free flour (or regular flour)
- 1 tbsp baking powder
- 1 tsp salt
- 1 tsp onion powder
- 6 tbsp butter (melted and cooled)
- 2 tbsp raw honey
- 1 cup sour cream
- 3 medium eggs
Variations
One of the best parts about this recipe is how flexible it can be! Feel free to play around with different ingredients to suit your taste or what you have on hand.
- Add some spice: Mix in diced jalapeños or chili flakes for a little heat!
- Cheesy goodness: Stir in a cup of shredded cheese before baking for an extra creamy texture.
- Veggie boost: Toss in some sautéed bell peppers or zucchini for added nutrition.
- Herb-infused flavor: Add fresh herbs like thyme or chives for an aromatic twist.
How to Make Corn Pudding Casserole
Step 1: Preheat Your Oven
Start by preheating your oven to 350°F (175°C). Preheating is essential because it helps your casserole cook evenly, giving it that beautiful golden top while keeping the inside creamy.
Step 2: Combine Dry Ingredients
In a large mixing bowl, whisk together the cornmeal, gluten-free flour, baking powder, salt, and onion powder. Mixing these dry ingredients well ensures that your casserole will have a consistent texture throughout.
Step 3: Mix Wet Ingredients
In another bowl, combine the melted butter, raw honey, sour cream, and eggs. Whisk until smooth. This mixture adds moisture and richness to your corn pudding casserole; don’t skip this step!
Step 4: Combine Everything Together
Now it’s time to fold everything together! Pour your wet ingredients into the dry mixture along with the frozen sweet corn and creamed corn. Stir gently until just combined. Be careful not to overmix; you want those lovely bits of corn intact.
Step 5: Bake It Up
Transfer your mixture into a greased baking dish and spread it evenly. Bake in your preheated oven for about 55 minutes or until golden brown on top. The aroma wafting through your kitchen will be simply divine!
Step 6: Cool & Serve
Let your Corn Pudding Casserole cool for about 10 minutes before serving. This waiting period helps set everything nicely so that each slice holds together beautifully when served.
Enjoy sharing this delightful casserole with loved ones—it’s sure to become a treasured recipe in your home!
Pro Tips for Making Corn Pudding Casserole
Creating the perfect corn pudding casserole is easier than you think! With a few helpful tips, you can ensure that your dish turns out to be a creamy, flavorful delight every time.
-
Use fresh ingredients: Whenever possible, opt for fresh corn instead of frozen. Fresh corn adds a vibrant sweetness and enhances the overall texture of your casserole.
-
Let the mixture rest: After combining all the ingredients, letting the mixture sit for about 10 minutes before baking allows the cornmeal to absorb moisture, resulting in a more tender consistency.
-
Don’t skip the cooling: Melting your butter and allowing it to cool prevents cooking the eggs when combined. This step helps achieve that silky smooth texture that makes corn pudding so irresistible.
-
Experiment with spices: Feel free to add other spices like paprika or garlic powder to customize flavors. A little experimentation can lead to delightful surprises!
-
Check for doneness: The casserole is done when it’s set in the center and lightly golden on top. A toothpick inserted should come out clean—this ensures you have that perfect creamy center without being undercooked.
How to Serve Corn Pudding Casserole
This corn pudding casserole is not just delicious; it’s also visually appealing and can be presented in various enticing ways. Here are some ideas to elevate your dish!
Garnishes
- Chopped fresh herbs: Sprinkle some chopped chives or parsley on top for a pop of color and freshness.
- Sour cream dollops: Add a spoonful of sour cream on each serving for an extra creamy texture and tangy flavor.
- Crushed tortilla chips: For a delightful crunch, garnish with crushed tortilla chips right before serving.
Side Dishes
- Roasted Vegetables: A medley of seasonal vegetables like zucchini, bell peppers, and carrots roasted until tender adds nutrients and complements the sweetness of the casserole beautifully.
- Grilled Chicken: Juicy grilled chicken breasts seasoned with herbs make for a protein-packed pairing that balances the richness of the corn pudding.
- Quinoa Salad: A light quinoa salad with diced cucumbers, tomatoes, and a lemon vinaigrette provides a refreshing contrast to the creamy casserole.
- Green Beans Almondine: Tender green beans sautéed with almonds create a crunchy side that’s not only tasty but also adds an elegant touch to your meal.
With these tips and serving suggestions, your corn pudding casserole will shine as the star of any gathering or weeknight dinner! Enjoy every delicious bite!
Make Ahead and Storage
This corn pudding casserole is perfect for meal prep, allowing you to enjoy its deliciousness throughout the week! You can easily make it ahead of time and store it for later, making it a convenient choice for busy days or special occasions.
Storing Leftovers
- Allow the casserole to cool completely before storing.
- Place leftover corn pudding in an airtight container.
- Store in the refrigerator for up to 3-4 days.
Freezing
- Let the casserole cool completely.
- Cut into individual portions for easy thawing.
- Wrap each portion tightly in plastic wrap and then place them in a freezer-safe bag or container.
- Freeze for up to 3 months.
Reheating
- Thaw frozen portions in the refrigerator overnight before reheating.
- Preheat your oven to 350°F (175°C).
- Place the casserole in an oven-safe dish and cover with foil to prevent drying out.
- Bake for about 20-25 minutes or until heated through.
FAQs
Here are some common questions about Corn Pudding Casserole that might help you get started!
Can I use fresh corn instead of frozen for Corn Pudding Casserole?
Yes, you can absolutely use fresh corn! Just make sure to cook it briefly before adding it to the mixture. Fresh corn adds a delightful crunch!
How do I know when my Corn Pudding Casserole is done baking?
Your Corn Pudding Casserole is done when it’s puffed up and golden brown on top. A toothpick inserted into the center should come out clean or with just a few moist crumbs attached.
Can I make Corn Pudding Casserole without eggs?
Yes! You can substitute eggs with flaxseed meal combined with water or unsweetened applesauce for a similar texture.
What can I serve with Corn Pudding Casserole?
Corn pudding casserole pairs wonderfully with roasted vegetables, grilled chicken, or as part of a festive holiday spread. It complements many savory dishes beautifully!
Final Thoughts
I hope this recipe brings joy to your kitchen as much as it does mine! The creamy texture and sweet flavor of the Corn Pudding Casserole make it a special addition to any meal. Enjoy making this dish, and don’t hesitate to share it with friends and family. Happy cooking!
Corn Pudding Casserole

Indulge in the warm and comforting flavors of Corn Pudding Casserole, a delightful dish that brings everyone together. With its golden, slightly crispy top and creamy center, this casserole is perfect for busy weeknights or special family gatherings. Its sweet corn essence combined with a hint of buttery richness makes it a favorite among kids and adults alike. Best of all, this easy-to-follow recipe allows you to whip it up in just minutes, ensuring you’ll want to make it over and over again. Elevate your meals with this versatile side dish that pairs beautifully with grilled chicken, roasted vegetables, or even stands alone as a satisfying main attraction.
- Prep Time: 5 minutes
- Cook Time: 55 minutes
- Total Time: 1 hour
- Yield: Serves 8
- Category: Side Dish
- Method: Baking
- Cuisine: American
Ingredients
- 1 ½ cups frozen sweet corn (defrosted and drained)
- 2 cans creamed corn
- 1 cup cornmeal
- ½ cup gluten-free flour (or regular flour)
- 1 tbsp baking powder
- 1 tsp salt
- 1 tsp onion powder
- 6 tbsp butter (melted and cooled)
- 2 tbsp raw honey
- 1 cup sour cream
- 3 medium eggs
Instructions
- Preheat your oven to 350°F (175°C).
- In a large bowl, combine cornmeal, gluten-free flour, baking powder, salt, and onion powder.
- In another bowl, whisk together melted butter, raw honey, sour cream, and eggs until smooth.
- Pour the wet ingredients into the dry mixture along with sweet corn and creamed corn; stir gently until just combined.
- Transfer to a greased baking dish and spread evenly. Bake for about 55 minutes or until golden brown on top.
- Allow to cool for 10 minutes before serving.
Nutrition
- Serving Size: 1/8 of casserole (approx. 120g)
- Calories: 220
- Sugar: 6g
- Sodium: 430mg
- Fat: 9g
- Saturated Fat: 5g
- Unsaturated Fat: 4g
- Trans Fat: 0g
- Carbohydrates: 33g
- Fiber: 2g
- Protein: 6g
- Cholesterol: 70mg

Leave a Comment