If you’re looking for a delightful treat that will satisfy your sweet tooth without the guilt, you’ve found it! These Peanut Butter Chocolate Chia Jam Cups are a game-changer. They combine creamy peanut butter, vibrant berries, and rich chocolate in a fun, layered format that’s perfect for any occasion. Whether you need a quick snack after a workout or want to impress guests at your next gathering, these no-bake cups are sure to be a hit!
What I love most about this recipe is how easy it is to prepare. With just five simple ingredients, it’s an excellent way to whip up something special without spending hours in the kitchen. Plus, each cup is packed with fiber and flavor—making them a wonderful option for busy weeknights or leisurely weekend indulgences.
Why You’ll Love This Recipe
- Quick and easy: With minimal prep time, you can have these delicious cups ready in no time!
- Family-friendly: Kids and adults alike will enjoy this tasty treat; it’s a great way to sneak in some healthy ingredients.
- Make-ahead convenience: Prepare these cups ahead of time and store them in the freezer for whenever you crave something sweet.
- Wholesome goodness: Each cup contains nutritious ingredients like berries and chia seeds, giving you that feel-good factor with every bite.
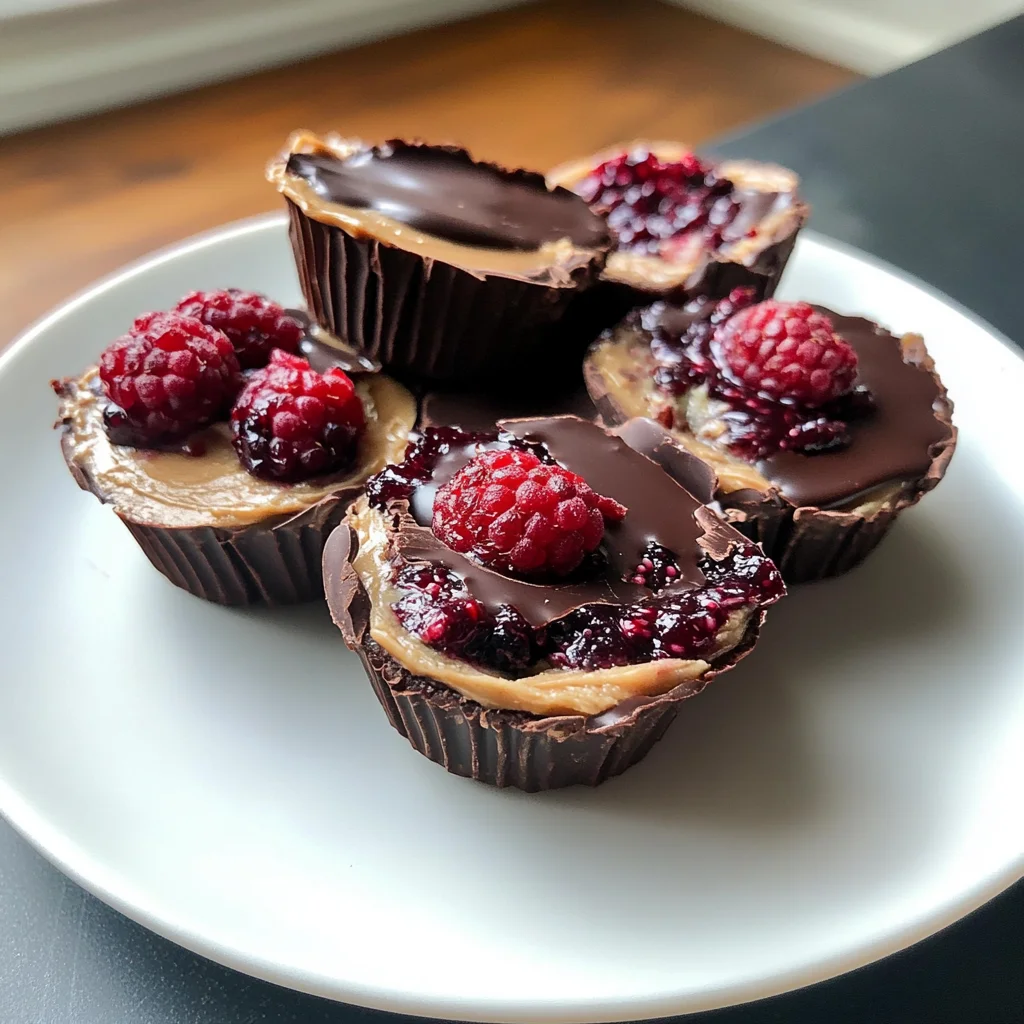
Ingredients You’ll Need
You’ll be happy to know that these Peanut Butter Chocolate Chia Jam Cups use simple and wholesome ingredients that are easy to find. Let’s gather what we need!
For the Peanut Butter Base
- 1/2 cup natural peanut butter
For the Chia Jam Layer
- 2 cups berries (I used raspberries & blackberries)
- 1/4 cup water
- 2 tbsp chia seeds
- 1 tbsp honey
For the Chocolate Topping
- 3/4 cup semi-sweet chocolate chips
Variations
This recipe is super flexible! You can easily customize it based on what you have on hand or your dietary preferences. Here are some fun ideas:
- Switch up the nut butter: Try almond butter or cashew butter for a different flavor profile.
- Use different fruits: Swap in strawberries, blueberries, or any seasonal fruit you love!
- Add protein: Mix in some protein powder into the peanut butter layer for an extra boost.
- Go vegan: Replace honey with maple syrup or agave nectar to keep it plant-based.
How to Make Peanut Butter Chocolate Chia Jam Cups
Step 1: Prepare the Peanut Butter Base
Start by dividing the peanut butter into 16 mini muffin cups. I highly recommend using a silicone mini muffin pan for easy removal later on. Each cup should get about 1.5 teaspoons of peanut butter. This base layer will become wonderfully creamy once frozen.
Step 2: Freeze the Peanut Butter
Next, place the muffin pan in the freezer until the peanut butter hardens completely. This step is crucial because it creates a solid foundation for our jam layer.
Step 3: Make the Berry Chia Jam
While waiting for the peanut butter layer to freeze, let’s make our berry chia jam! Add your chosen berries and water to a small saucepan over medium heat. Simmer until most of the berries break down—feel free to smash any remaining pieces with a fork for that delightful spreadable texture.
Step 4: Add Chia Seeds and Honey
Once your berries are nice and mushy, turn down the heat and stir in chia seeds and honey. Let this simmer on low for another 2-3 minutes. The chia seeds will help thicken our jam while adding nutritional benefits!
Step 5: Cool Down the Jam
Remove your berry mixture from heat and let it cool for about five minutes before transferring it into a container. Cooling is important because it helps everything set beautifully when layered over our peanut butter.
Step 6: Layer on the Berry Jam
Take out your muffin pan from the freezer and carefully spoon your cooled berry chia jam over each hardened peanut butter layer. Aim to cover completely but leave just enough room for our final chocolate topping.
Step 7: Freeze Again
Pop that muffin pan back into the freezer again until your berry jam layer has set properly.
Step 8: Melt Your Chocolate Chips
While waiting for the jam layer to harden, melt your chocolate chips using either a double boiler or microwave method (15-30 second intervals). Stir frequently so they melt evenly without burning.
Step 9: Top with Melted Chocolate
Once everything’s cooled down nicely, remove your muffin pan from the freezer again. Now pour melted chocolate over each jam layer, distributing evenly among all cups—this topping brings everything together!
Step 10: Final Freeze
Return those delicious bites to the freezer one last time until they’re completely frozen through.
Step 11: Enjoy!
Once fully frozen, store these tasty treats in an airtight container in your freezer. Whenever you’re craving something sweet yet healthy, just grab one (or two!) and enjoy every delightful bite!
Pro Tips for Making Peanut Butter Chocolate Chia Jam Cups
Creating these delicious treats is a breeze with a few helpful tips!
-
Use silicone muffin pans: They make it easier to pop the cups out without breaking them, ensuring that your beautiful layers stay intact.
-
Let the jam cool properly: Allowing the chia jam to cool completely before adding it to the cups helps prevent the chocolate layer from melting and keeps everything beautifully layered.
-
Be mindful of portion sizes: Using a teaspoon to measure out peanut butter ensures uniformity in your cups, making them visually appealing and consistent in flavor.
-
Experiment with sweeteners: If you prefer a different level of sweetness, feel free to swap honey for maple syrup or agave nectar, which also work well in this recipe.
How to Serve Peanut Butter Chocolate Chia Jam Cups
Serving these delightful cups can be just as fun as making them! Here are some ideas to enhance your presentation.
Garnishes
- Fresh mint leaves: A sprig of mint adds a pop of color and a refreshing aroma that complements the flavors beautifully.
- Cocoa powder dusting: Lightly dusting the tops with cocoa powder gives an elegant look while enhancing the chocolate flavor.
Side Dishes
- Fruit salad: A mix of seasonal fruits adds freshness and balances the richness of the cups. Consider including berries, melons, and citrus for variety.
- Yogurt parfait: Layered yogurt with granola and fruits pairs nicely, offering creaminess and crunch alongside your sweet treats.
- Nutty granola bars: These provide a chewy texture that contrasts well with the crispness of your peanut butter cups, making for a satisfying snack combo.
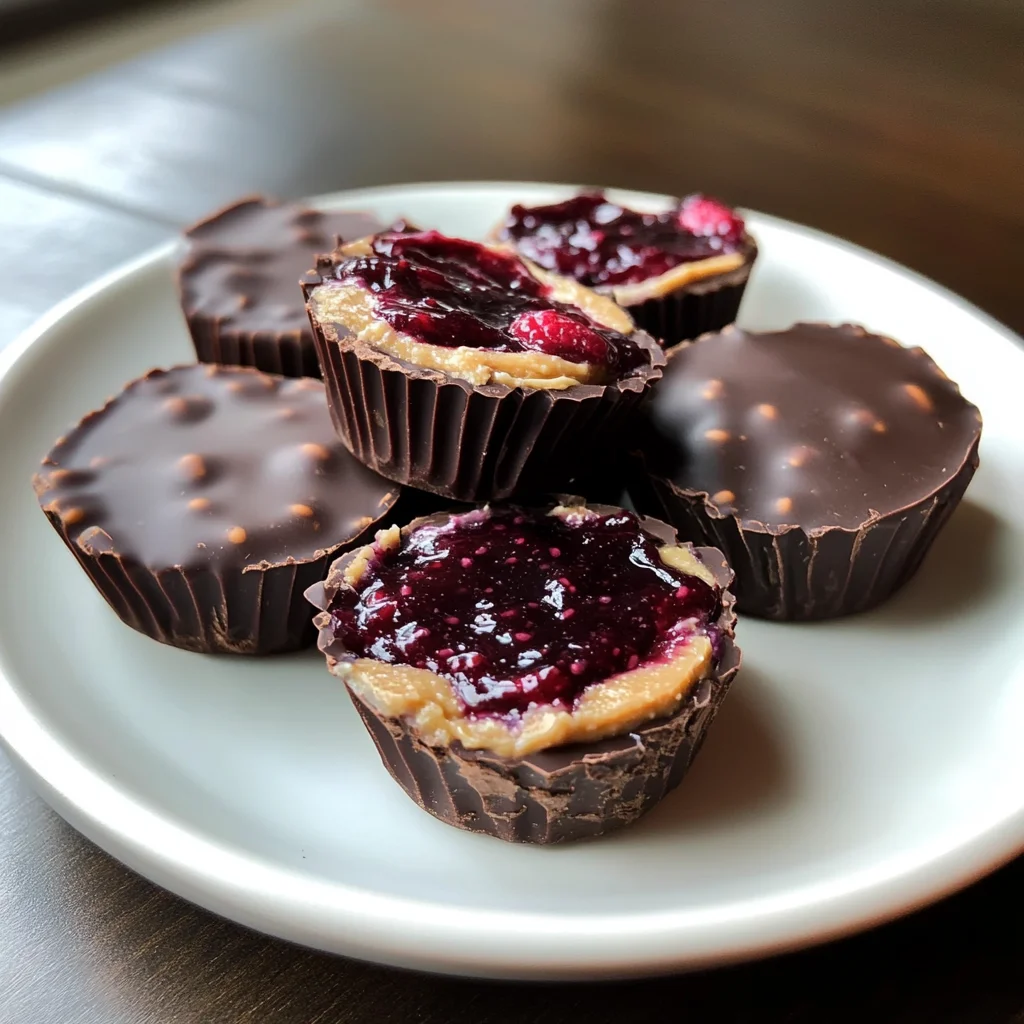
Make Ahead and Storage
These Peanut Butter Chocolate Chia Jam Cups are perfect for meal prep, making them a convenient and healthy treat to have on hand throughout the week.
Storing Leftovers
- Store any leftover cups in an airtight container.
- Keep them in the refrigerator for up to 5 days for the best flavor and texture.
Freezing
- For longer storage, these cups can be frozen.
- Place them in a freezer-safe container or bag, separating layers with parchment paper.
- They can be frozen for up to 3 months.
Reheating
- To enjoy them after freezing, simply let them thaw in the refrigerator overnight.
- If you prefer them slightly warmer, allow them to sit at room temperature for about 10 minutes before serving.
FAQs
Can I make Peanut Butter Chocolate Chia Jam Cups without honey?
Yes! You can substitute honey with maple syrup or agave nectar for a vegan option.
How long do Peanut Butter Chocolate Chia Jam Cups last?
When stored properly in the refrigerator, these treats last up to 5 days. If frozen, they can last up to 3 months!
What can I use instead of chia seeds in this recipe?
If you don’t have chia seeds, you can use ground flaxseeds as a substitute. Just note that it may alter the texture slightly.
Final Thoughts
I hope you enjoy making these delightful Peanut Butter Chocolate Chia Jam Cups as much as I do! They’re not only delicious but also packed with nutrients and perfect for satisfying your sweet tooth guilt-free. Get creative with your berry choices and have fun experimenting. Happy cooking!
Peanut Butter Chocolate Chia Jam Cups
Indulge in a guilt-free delight with these Peanut Butter Chocolate Chia Jam Cups. Perfect for satisfying your sweet cravings without compromising on health, these no-bake treats combine creamy natural peanut butter, vibrant berries, and rich semi-sweet chocolate in a delightful layered format. Whether you’re looking for a quick post-workout snack or an impressive dessert for guests, these cups are versatile and easy to prepare with just five simple ingredients. Packed with fiber and flavor, they’re perfect for busy weeknights or leisurely weekends. Enjoy the wholesome goodness of berries and chia seeds while treating yourself to something sweet!
- Prep Time: 20 minutes
- Cook Time: 10 minutes
- Total Time: 30 minutes
- Yield: Makes about 16 cups 1x
- Category: Dessert
- Method: No-bake
- Cuisine: American
Ingredients
- 1/2 cup natural peanut butter
- 2 cups mixed berries (such as raspberries and blackberries)
- 1/4 cup water
- 2 tbsp chia seeds
- 1 tbsp honey
- 3/4 cup semi-sweet chocolate chips
Instructions
- Divide the peanut butter into 16 mini muffin cups (about 1.5 teaspoons each).
- Freeze until solid.
- In a saucepan, simmer berries and water until soft; mash as needed.
- Stir in chia seeds and honey; simmer for an additional 2-3 minutes.
- Cool the jam before layering over the frozen peanut butter.
- Freeze again until set.
- Melt chocolate chips and pour over the jam layer.
- Final freeze until completely solid.
Nutrition
- Serving Size: 1 cup (45g)
- Calories: 150
- Sugar: 8g
- Sodium: 4mg
- Fat: 9g
- Saturated Fat: 2g
- Unsaturated Fat: 7g
- Trans Fat: 0g
- Carbohydrates: 15g
- Fiber: 3g
- Protein: 4g
- Cholesterol: 0mg

Leave a Comment