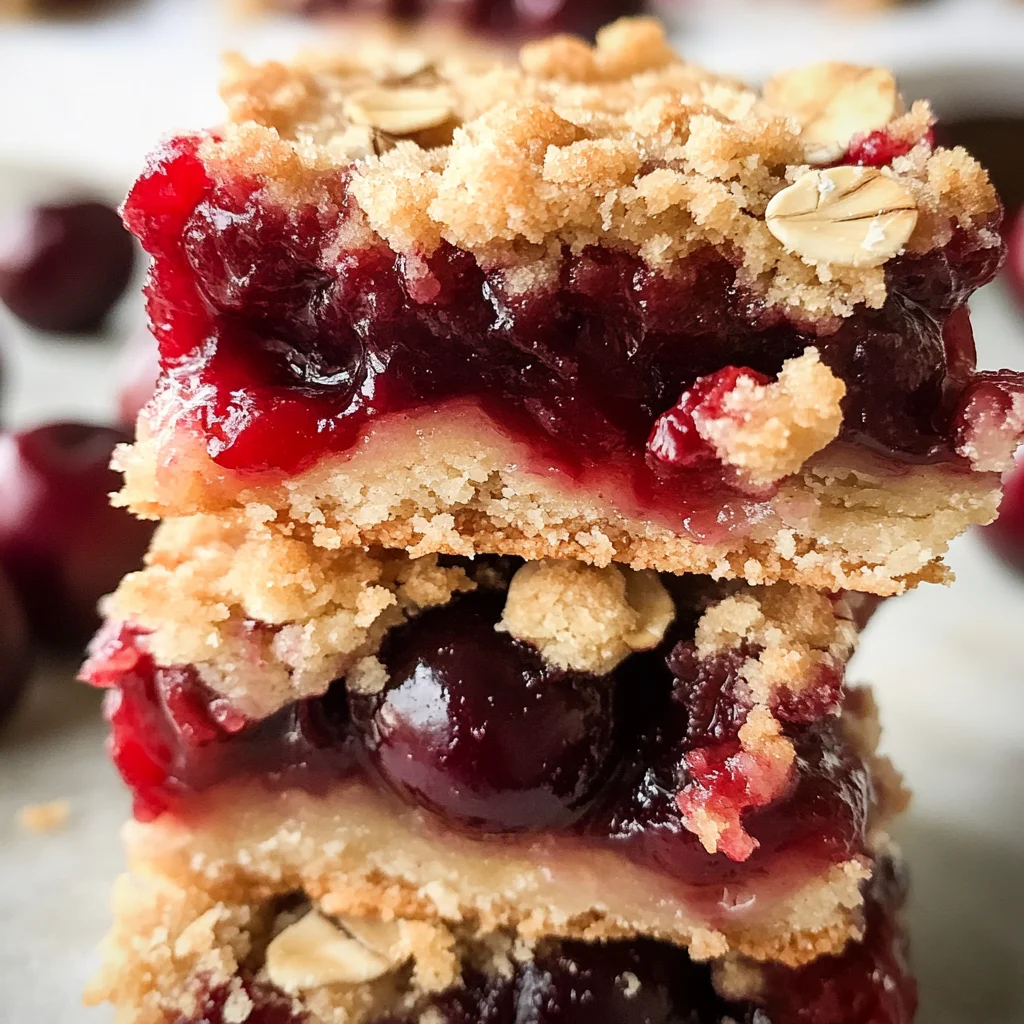
If you’re looking for a delightful dessert that screams summer, you’ve come to the right place! Cherry Pie Crumble Bars are a family favorite in my home. The combination of a buttery shortbread-like crust, a sweet and tangy cherry filling, and a crunchy oatmeal topping creates the perfect bite. Whether it’s a busy weeknight or a family gathering, these bars bring joy to any occasion.
What I love most about this recipe is its simplicity. You can whip it up with just a handful of wholesome ingredients, making it an easy go-to for those moments when you want something sweet without all the fuss. Trust me, once you serve these Cherry Pie Crumble Bars, everyone will be asking for the recipe!
Why You’ll Love This Recipe
- Easy to Make: With just a few simple steps, you’ll have these delicious bars ready in no time!
- Family-Friendly: Kids and adults alike will love the sweet cherry flavor and crumbly texture.
- Healthy Ingredients: Made with wholesome ingredients, they’re a guilt-free treat!
- Make Ahead: Perfect for meal prep; they store well in the fridge for later snacking.
- Customizable: Feel free to experiment with different fruits or toppings!
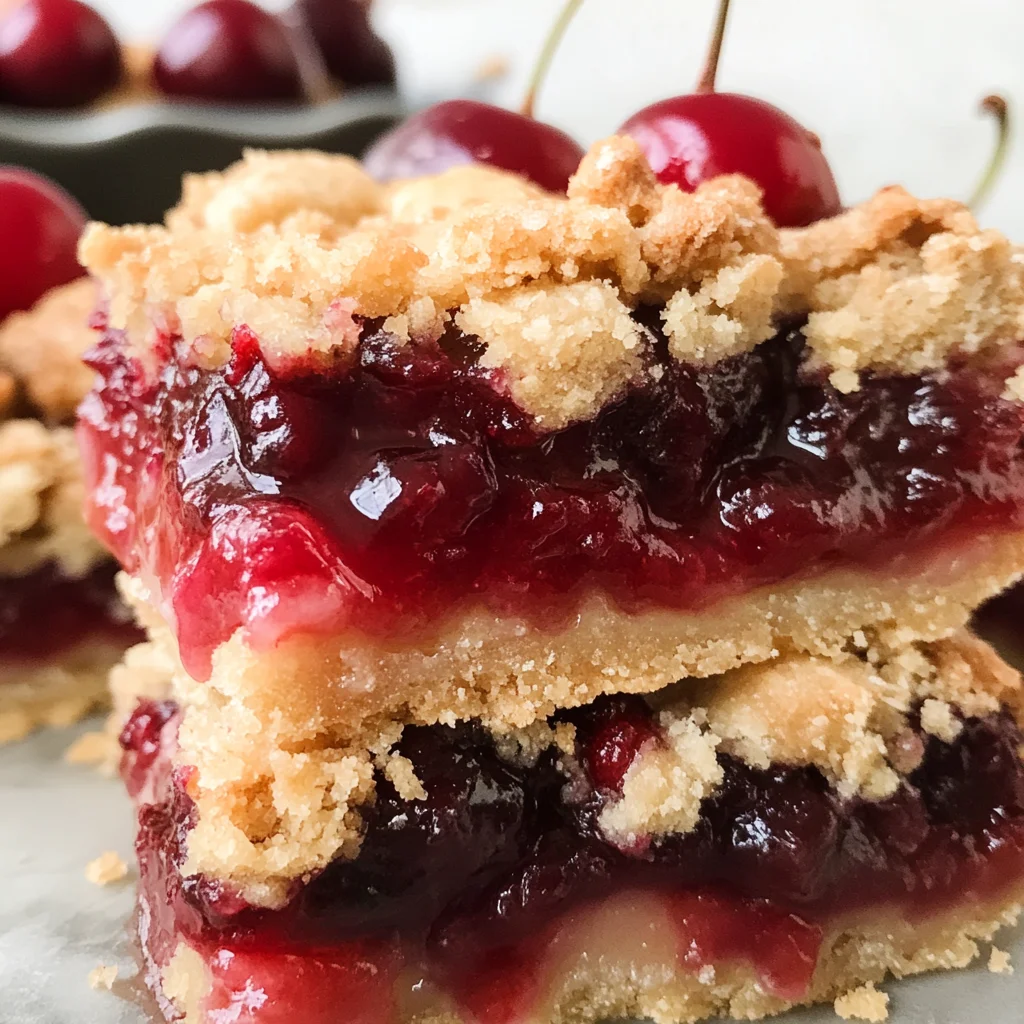
Ingredients You’ll Need
These Cherry Pie Crumble Bars are made with simple, wholesome ingredients that you probably already have in your pantry. Let’s gather what we need!
For the Crust and Topping
- 2 cups almond flour
- 1 cup oat flour
- 1/4 cup oats (only in crumb topping!)
- 1/2 cup melted refined coconut oil
- 1/3 cup + 2 tbsp pure maple syrup
- 1 1/2 tsp vanilla extract
- 1/2 tsp salt
For the Cherry Filling
- 1 1/2 cup cherries (fresh or frozen)
- 2 tbsp pure maple syrup
- 1 tbsp water
- 1/2 tsp cornstarch
Variations
This recipe is wonderfully flexible! Here are some fun variations to try:
- Mix in other fruits: Swap out half of the cherries for blueberries or raspberries for a mixed berry crumble.
- Add spices: Sprinkle in some cinnamon or nutmeg to add an extra depth of flavor to the filling.
- Change the flour: Use coconut flour instead of almond flour for a different texture.
- Make it nut-free: Substitute almond flour with sunflower seed flour for those with nut allergies.
How to Make Cherry Pie Crumble Bars
Step 1: Prepare the Cherry Filling
Start by making the cherry filling. In a small saucepan over low to medium heat, combine the cherries, maple syrup, and water. This step is crucial because it allows the cherries to soften and release their juices. As they warm up, gently smash them with a spoon; this releases even more flavor! Once everything is mixed well, stir in the cornstarch. Simmer this mixture for about 5 minutes until it thickens slightly. Then remove it from heat and pop it into the fridge to set up while you prepare the crust.
Step 2: Make the Crust
In a large mixing bowl, whisk together almond flour, oat flour, and salt. This blend gives your crust that delightful shortbread texture. Next, mix in melted coconut oil, pure maple syrup, and vanilla extract until everything is well combined. The mixture should be moist but crumbly—perfect for forming your crust!
Step 3: Assemble Your Bars
Now it’s time to assemble! Press about two-thirds of your mixture into a greased or lined 8×8 baking dish evenly across the bottom. This forms your lovely crust layer. Spread your cherry filling over this base layer evenly so every bite gets that delicious fruit flavor.
Step 4: Create the Crumble Topping
To create that irresistible crumble topping, add oats to the remaining one-third of your crust mixture and combine well. Sprinkle this mixture generously on top of your cherry filling—this will bake into a crunchy layer that contrasts beautifully with the soft cherries underneath.
Step 5: Bake
Pop your assembled dish into an oven preheated to 350 degrees Fahrenheit and bake for about 30 minutes until golden brown on top. The aroma wafting through your kitchen will be simply heavenly!
Once baked, let them cool before slicing into squares. Enjoy these Cherry Pie Crumble Bars warm or chilled—either way, they’re sure to be a hit!
Pro Tips for Making Cherry Pie Crumble Bars
Making Cherry Pie Crumble Bars can be a delightful experience, and with these handy tips, you’ll ensure they turn out perfectly every time!
-
Use fresh cherries for the best flavor: If you have access to fresh cherries, they will provide a burst of sweetness and tartness that frozen cherries might not match. However, if you only have frozen on hand, just make sure to thaw and drain them well before use.
-
Don’t skip the chilling step: Allowing the cherry filling to cool in the fridge not only helps it thicken but also ensures that the bars hold their shape when cut. This extra step is key to achieving that perfect bite!
-
Keep your crumble topping chunky: When mixing oats into your remaining crust mixture, try to keep some larger clumps. This creates a wonderful texture contrast on top of the soft cherry filling, making each bite satisfying.
-
Let them cool completely before slicing: Patience is a virtue! Allowing these bars to cool completely will help them set up nicely and makes cutting them into squares much easier.
-
Experiment with different flours: If almond or oat flour isn’t available, feel free to substitute with other gluten-free flours like coconut flour or a gluten-free all-purpose blend. Just keep in mind that textures may vary slightly.
How to Serve Cherry Pie Crumble Bars
Cherry Pie Crumble Bars are both visually stunning and delicious, making them perfect for any occasion. Here are some fun ideas on how to present this delightful dessert!
Garnishes
- Dust with powdered sugar: A light sprinkle of powdered sugar adds an elegant touch and enhances the sweetness without overwhelming the flavors.
- Serve with dairy-free whipped cream: A dollop of dairy-free whipped cream adds creaminess and balances the tart cherry filling beautifully.
- Add fresh mint leaves: A few mint leaves on top not only adds a pop of color but also brings a refreshing note that complements the cherries.
Side Dishes
- Coconut yogurt: This creamy side dish pairs wonderfully with the tartness of the cherries. It also adds a dose of healthy probiotics!
- Vanilla ice cream: For those warm summer days, serve these bars with a scoop of dairy-free vanilla ice cream for a classic dessert combination.
- Fruit salad: A light fruit salad made of seasonal berries and melons offers a refreshing contrast to the richness of the bars.
- Herbal tea: Pairing your Cherry Pie Crumble Bars with a cup of herbal tea creates a cozy atmosphere perfect for afternoon gatherings or dessert after dinner.
With these serving suggestions and pro tips, you’ll be able to impress family and friends alike with your delicious Cherry Pie Crumble Bars! Enjoy baking and sharing this delightful treat!
Make Ahead and Storage
These Cherry Pie Crumble Bars make for a fantastic meal prep dessert! You can easily whip up a batch in advance and store them to enjoy throughout the week. Here’s how to keep them fresh and delicious.
Storing Leftovers
- Store the bars in an airtight container at room temperature for up to 3 days.
- For longer storage, refrigerate them, where they will stay fresh for about a week.
- When storing in the fridge, place parchment paper between layers to prevent sticking.
Freezing
- Cut the bars into squares before freezing for easy serving.
- Wrap each square in plastic wrap or aluminum foil, then place them in a freezer-safe bag or container.
- They can be frozen for up to 3 months. Thaw overnight in the fridge before enjoying!
Reheating
- To reheat, place a bar in the microwave for about 15-20 seconds until warmed through.
- Alternatively, warm them in a preheated oven at 350 degrees F (175 degrees C) for 5-10 minutes.
FAQs
Here are some common questions you might have about making these delicious Cherry Pie Crumble Bars!
Can I make Cherry Pie Crumble Bars gluten-free?
Absolutely! By using oat flour and almond flour as listed in the recipe, these bars are naturally gluten-free. Just ensure your oats are certified gluten-free if you’re sensitive.
How long do Cherry Pie Crumble Bars last?
When stored properly, these bars can last up to a week in the refrigerator or can be frozen for up to three months. Perfect for meal prep!
Can I use frozen cherries for my Cherry Pie Crumble Bars?
Yes! Frozen cherries work perfectly in this recipe. Just remember to thaw and drain any excess liquid before adding them to your filling.
What can I substitute for maple syrup in Cherry Pie Crumble Bars?
If you need an alternative, agave nectar or honey (if not vegan) can be used instead of maple syrup. Adjust sweetness to taste as needed.
Final Thoughts
I truly hope you find joy in making these Cherry Pie Crumble Bars! With their delightful balance of sweet cherry filling and crunchy crumble topping, they’re bound to become a family favorite. Whether enjoyed warm from the oven or chilled from the fridge, they offer a sweet treat that everyone will love. Enjoy every bite and share your experience—I can’t wait to hear how they turn out for you!
Cherry Pie Crumble Bars
Cherry Pie Crumble Bars are a delightful summer treat that perfectly balances sweet and tangy flavors in a convenient, easy-to-serve format. With a buttery shortbread crust, luscious cherry filling, and a crunchy oatmeal topping, these bars are sure to become a family favorite. They’re not only simple to make but also use wholesome ingredients, making them a guilt-free dessert option. Whether for a busy weeknight snack or a special gathering, these Cherry Pie Crumble Bars bring joy to every occasion. Just wait until you share them; everyone will be clamoring for the recipe!
- Prep Time: 15 minutes
- Cook Time: 30 minutes
- Total Time: 45 minutes
- Yield: 12 servings 1x
- Category: Dessert
- Method: Baking
- Cuisine: American
Ingredients
- 2 cups almond flour
- 1 cup oat flour
- 1/4 cup oats (for topping)
- 1/2 cup melted refined coconut oil
- 1/3 cup + 2 tbsp pure maple syrup
- 1 1/2 cups cherries (fresh or frozen)
- 1/2 tsp cornstarch
Instructions
- Prepare the cherry filling by heating cherries, maple syrup, and water in a saucepan over medium heat. Smash gently, stir in cornstarch, and simmer for about 5 minutes until thickened. Chill.
- For the crust, mix almond flour, oat flour, and salt in a bowl. Add coconut oil, maple syrup, and vanilla extract until well combined.
- Press two-thirds of the mixture into an 8×8 baking dish as the base.
- Spread chilled cherry filling over the crust layer.
- Mix oats into the remaining crust mixture and sprinkle on top of the cherries.
- Bake at 350°F for approximately 30 minutes until golden brown. Cool before slicing.
Nutrition
- Serving Size: 1 bar (70g)
- Calories: 220
- Sugar: 10g
- Sodium: 35mg
- Fat: 12g
- Saturated Fat: 9g
- Unsaturated Fat: 3g
- Trans Fat: 0g
- Carbohydrates: 25g
- Fiber: 3g
- Protein: 4g
- Cholesterol: 0mg
Leave a Comment