If you’re looking for a delightful way to brighten your day or add a splash of flavor to your home, then you’ve come to the right place! Today, I’m thrilled to share my cherished recipe on how to make DIY dried orange slices: simple oven recipe. These little gems are not only beautiful but also incredibly versatile! They make for a perfect snack, an eye-catching garnish for drinks, or a lovely addition to your holiday decorations.
What I love most about this recipe is how easy it is. With just a few navel oranges and some time in the oven, you’ll have crispy, flavorful slices that everyone will adore. Whether it’s a busy weeknight or a family gathering, these dried orange slices will surely impress your guests and family alike!
Why You’ll Love This Recipe
- Easy to prepare: With minimal ingredients and simple steps, even beginners can enjoy making these treats.
- Family-friendly: Kids love helping out in the kitchen, and they’ll have fun arranging the slices!
- Great for snacking: These dried orange slices make for a healthy and tasty snack any time of day.
- Versatile use: Use them in recipes, as decorations, or enjoy them on their own!
- Make-ahead convenience: Prepare them in advance and store them for whenever you need a burst of citrusy goodness.
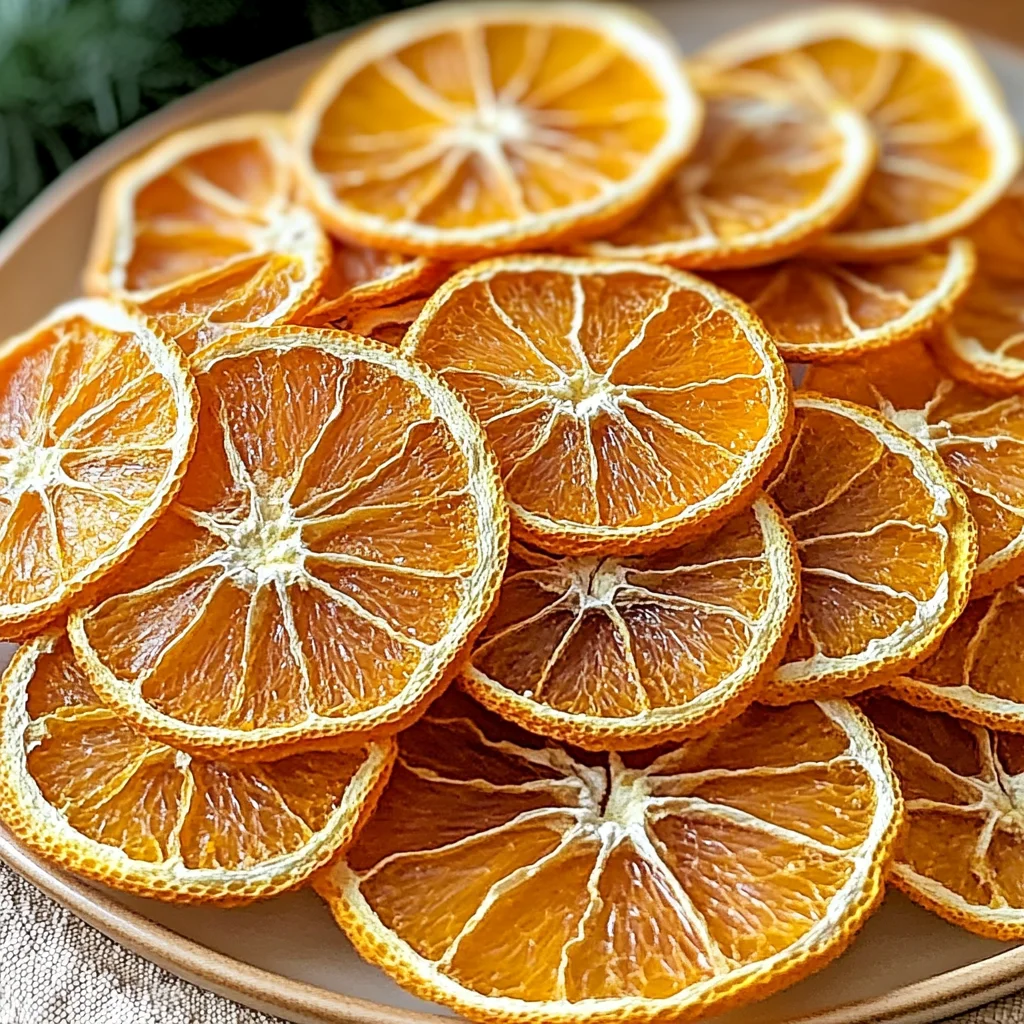
Ingredients You’ll Need
Let’s gather our simple and wholesome ingredients! You only need navel oranges for this delightful treat. Here’s what you’ll need:
- 3 units navel oranges
Variations
This recipe is wonderfully flexible! Feel free to get creative with these variation ideas:
- Add spices: Sprinkle a little cinnamon or nutmeg before baking for extra warmth.
- Try other citrus fruits: Lemon or lime slices can also be dried using this same method for a zesty twist.
- Mix textures: Combine with other dried fruits like apples or cranberries for a colorful snack mix.
- Use essential oils: A drop of food-safe essential oil can enhance the aroma while drying.
How to Make How to Make DIY Dried Orange Slices: Simple Oven Recipe
Step 1: Preheat the Oven
Start by preheating your oven to 175°F. This gentle heat will slowly dry out the oranges without burning them. It sets the stage for those beautifully crisp slices!
Step 2: Prepare Your Baking Pans
Line two large baking pans with parchment paper and place a wire rack on top of each pan. The racks allow air to circulate around the orange slices, ensuring they dry evenly.
Step 3: Slice the Oranges
Carefully slice the navel oranges into thin rounds. Be sure to remove the ends where there’s mostly pith. Thin slices will dry better and give you that perfect crunch!
Step 4: Absorb Extra Juice
Lay your orange slices out between layers of paper towels and press down gently. This step helps absorb excess juice and speeds up the drying process.
Step 5: Arrange and Bake
Now it’s time to arrange those beautiful orange slices on your wire racks! Bake them in the preheated oven for one hour. The smell of baking oranges is simply heavenly!
Step 6: Flip and Continue Baking
After an hour, flip each slice over carefully. Bake again for another hour; this helps both sides dry evenly. It’s important not to rush this step!
Step 7: Repeat Flipping Process
Continue flipping every hour until you’ve baked them for three hours total. Check after three hours; any fully dried slices should be transferred to a plate.
Step 8: Final Checks
For any slices that remain plump or sticky, flip them again and return them to the oven for another 30 minutes. Keep checking until all are perfectly dried!
With these simple steps, you’ll have deliciously crispy DIY dried orange slices ready in no time! Enjoy experimenting with this lovely recipe—you might just find it becomes one of your favorites too!
Pro Tips for Making How to Make DIY Dried Orange Slices: Simple Oven Recipe
Making dried orange slices can be a delightful and rewarding experience, and these tips will help you achieve the perfect result!
-
Choose ripe oranges: Selecting juicy navel oranges ensures that your dried slices will have vibrant flavor and a beautiful color, enhancing both taste and presentation.
-
Cut evenly: Aim for uniform thickness in your orange slices (about 1/4 inch). Consistent thickness helps them dry at the same rate, preventing some from becoming too crispy while others remain chewy.
-
Use parchment paper: Lining your baking pans with parchment paper not only prevents sticking but also makes cleanup a breeze, allowing you to enjoy your homemade treats without the hassle.
-
Don’t rush the drying process: Patience is key! Allowing the slices to dry thoroughly ensures they are crispy and preserves their flavor. If you remove them too early, they may become sticky or spoil faster.
-
Store properly: Once cooled, keep your dried orange slices in an airtight container away from light and moisture. This keeps them fresh longer, so you can enjoy your delightful snacks anytime!
How to Serve How to Make DIY Dried Orange Slices: Simple Oven Recipe
Dried orange slices make a charming addition to various dishes or can be enjoyed on their own as a healthy snack. Here are some fun ideas for serving these delicious treats!
Garnishes
- Fresh herbs: Sprigs of mint or rosemary can add a lovely touch of color and aroma when placed alongside your dried orange slices on a platter.
- Edible flowers: Consider adding edible flowers such as pansies or nasturtiums for an eye-catching garnish that complements the bright orange hues beautifully.
Side Dishes
- Cheese platter: Pair your dried orange slices with a selection of cheeses like creamy brie or tangy goat cheese. The sweetness of the oranges enhances the flavors of the cheeses perfectly!
- Granola bowl: Add dried orange slices to your morning granola with yogurt and honey for a refreshing twist. They provide natural sweetness that elevates this wholesome breakfast option.
- Herbal tea: Serve alongside a steaming cup of herbal tea; the citrus notes from the oranges complement many herbal blends and create a cozy atmosphere.
- Salad topping: Sprinkle chopped dried orange slices over mixed greens with nuts and vinaigrette for a refreshing crunch that adds both texture and flavor to your salad.
Enjoy experimenting with these serving suggestions, and let your creativity shine! Whether you’re snacking on them straight out of the jar or using them as an elegant garnish, DIY dried orange slices will surely impress friends and family alike.
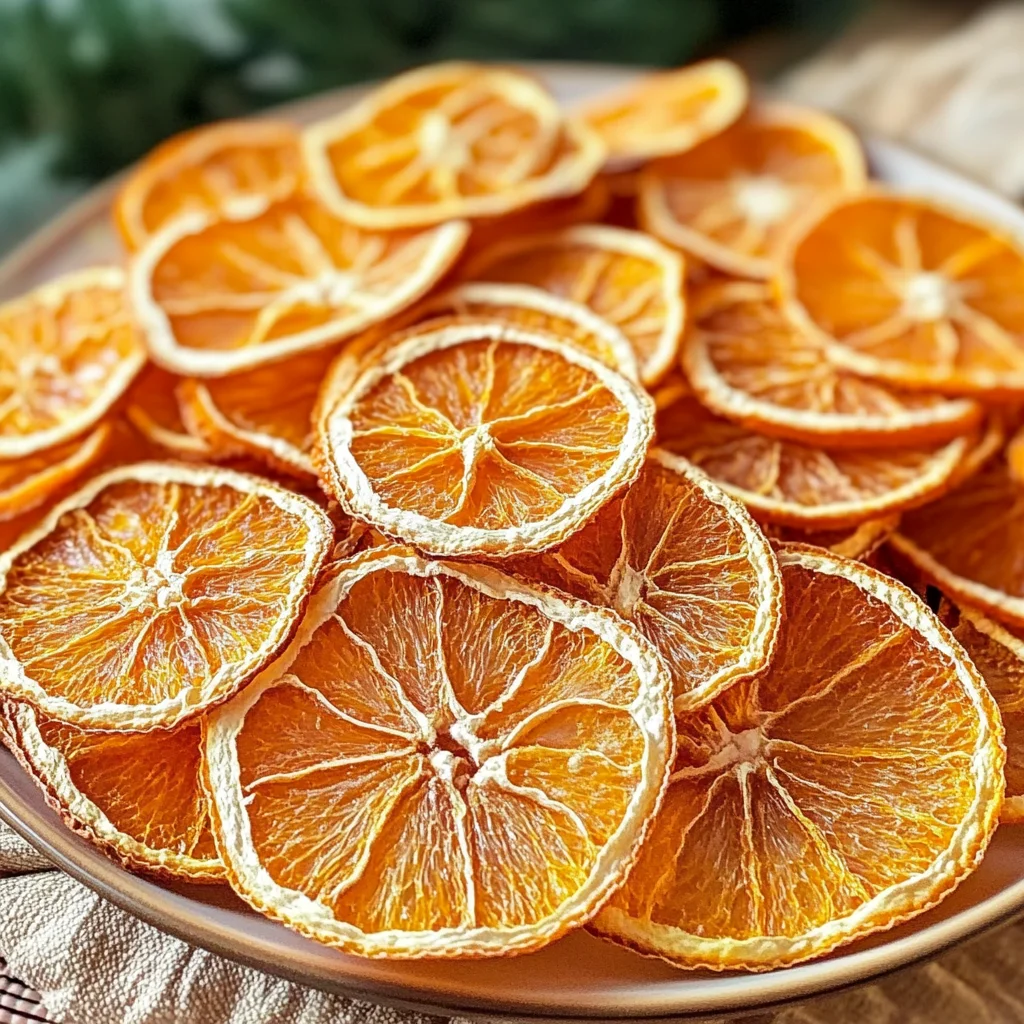
Make Ahead and Storage
This DIY Dried Orange Slices recipe is fantastic for meal prep! You can make a batch in advance and store them for later use, whether it’s for snacking, decorating, or adding to beverages. Here are some tips on how to store your delicious creations.
Storing Leftovers
- Store completely dried orange slices in an airtight container.
- Keep them in a cool, dry place away from direct sunlight.
- Properly stored, they can last up to 6 months.
Freezing
- If you want to keep the slices even longer, consider freezing them.
- Place the dried orange slices in a single layer on a baking sheet and freeze until solid.
- Transfer to a freezer-safe bag or container, removing as much air as possible.
Reheating
- There’s no need to reheat dried orange slices, but if you want to refresh them, simply place them in the oven at a low temperature for about 10 minutes.
- Make sure not to burn them; keep an eye on the slices during this process!
FAQs
You might have some questions about making DIY Dried Orange Slices. Let’s dive into some common inquiries!
How to Make DIY Dried Orange Slices?
To make DIY Dried Orange Slices, slice navel oranges thinly and bake them at a low temperature (175°F) for about 3 hours total until they are fully dried. This simple oven recipe yields crispy and delightful snacks.
Can I use other citrus fruits for this recipe?
Yes! While this recipe uses navel oranges, you can substitute with lemons, limes, or grapefruits. Each will provide a unique flavor profile while following the same drying process.
How long do DIY Dried Orange Slices last?
When stored properly in an airtight container in a cool, dry place, your DIY Dried Orange Slices can last up to 6 months.
What can I use dried orange slices for?
Dried orange slices are versatile! Use them as a garnish for drinks, an ingredient in potpourri, or simply enjoy them as a healthy snack!
Final Thoughts
I hope you’ve enjoyed learning how to make these beautiful and tasty DIY Dried Orange Slices! They are such a delightful way to add a splash of color and flavor to your snacks or decorations. I can’t wait for you to try making these at home—it’s easier than it seems! Enjoy every slice!
How to Make DIY Dried Orange Slices: Simple Oven Recipe

Brighten your day with homemade DIY Dried Orange Slices! This simple oven recipe transforms navel oranges into crispy, flavorful snacks that are perfect for any occasion. With just a few ingredients and easy steps, you can create delightful treats that are not only delicious but also versatile. Use them as garnishes for beverages, incorporate them into holiday decorations, or enjoy them as a healthy snack any time of the day. The aroma of baking oranges fills your kitchen, making the entire process an enjoyable experience for both kids and adults alike. Get ready to impress friends and family with these charming dried orange slices!
- Prep Time: 10 minutes
- Cook Time: 180 minutes
- Total Time: 3 hours 10 minutes
- Yield: Approximately 20 slices 1x
- Category: Dessert
- Method: Baking
- Cuisine: American
Ingredients
- 3 navel oranges
Instructions
- Preheat your oven to 175°F (80°C).
- Line two large baking pans with parchment paper and place wire racks on top.
- Slice the navel oranges into thin rounds, removing the ends with excess pith.
- Lay the slices between paper towels and press gently to absorb extra juice.
- Arrange orange slices on wire racks and bake for 1 hour.
- Flip each slice and continue baking for another hour.
- Repeat flipping every hour until baked for a total of 3 hours.
- Check for doneness; if any slices remain sticky, return them to the oven for an additional 30 minutes.
Nutrition
- Serving Size: 1 slice
- Calories: 30
- Sugar: 6g
- Sodium: 0mg
- Fat: 0g
- Saturated Fat: 0g
- Unsaturated Fat: 0g
- Trans Fat: 0g
- Carbohydrates: 7g
- Fiber: 2g
- Protein: 0g
- Cholesterol: 0mg

Leave a Comment