If you’re looking for a deliciously easy dish that brings everyone together, you’ve stumbled upon the perfect recipe: Italian Grinder Sliders! These mouthwatering mini sandwiches are packed with layers of savory deli meats and gooey melted cheese, all topped off with a delectable garlic parmesan glaze. Whether you’re hosting a casual family gathering, planning a game day feast, or just need a quick weeknight dinner, these sliders are sure to be a hit.
What makes these Italian Grinder Sliders so special is their versatility and flavor. They’re simple enough for the busiest of nights but fancy enough to impress your guests. Plus, they’re perfect for sharing — just watch how quickly they disappear!
Why You’ll Love This Recipe
- Quick to make: Ready in just 30 minutes, perfect for those busy weeknights.
- Family-friendly: Kids and adults alike will love the cheesy goodness and tasty toppings.
- Make-ahead option: Assemble ahead of time and bake just before serving for effortless entertaining.
- Flexible flavors: Customize with your favorite ingredients; the possibilities are endless!
- Perfect for gatherings: Ideal for parties, picnics, or any occasion where you want finger food that’s full of flavor.
Ingredients You’ll Need
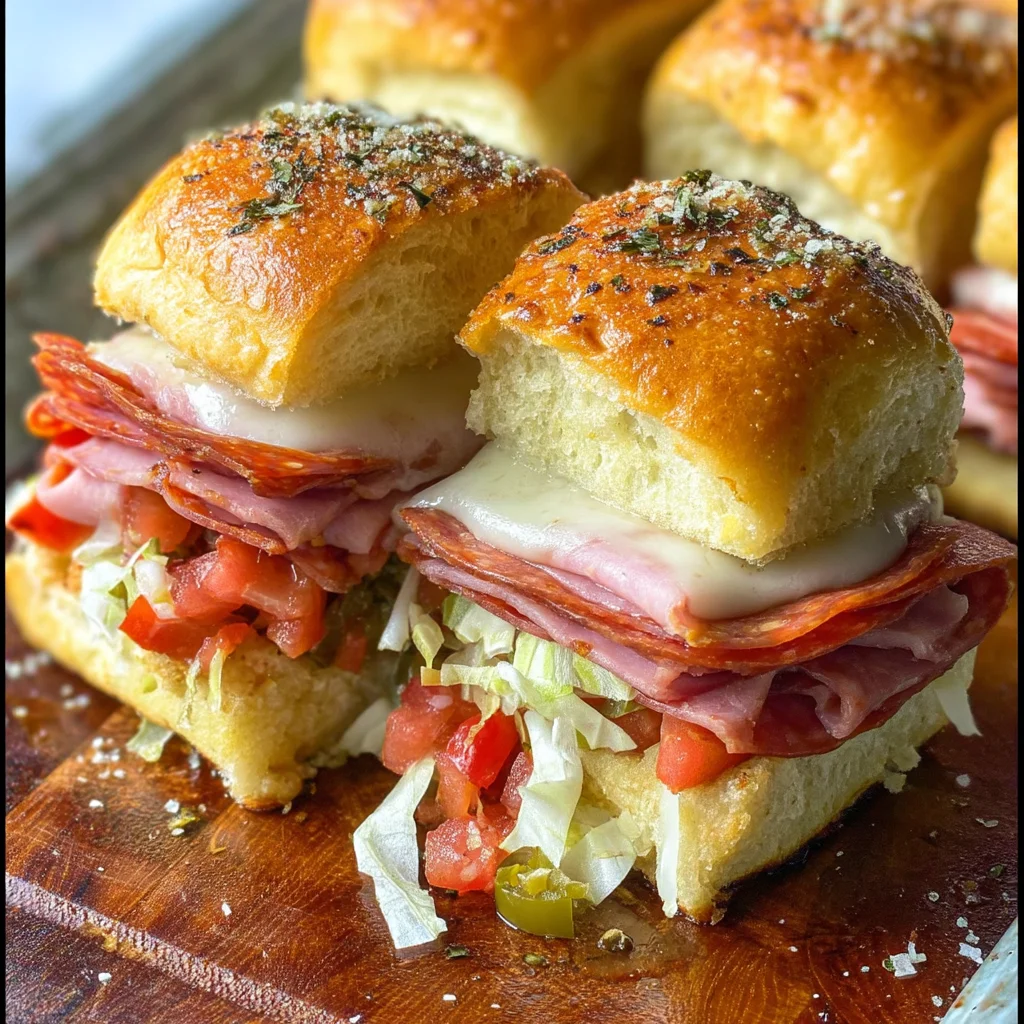
These Italian Grinder Sliders are made with simple, wholesome ingredients that you may already have on hand. Each component contributes to that classic Italian flavor profile we all adore!
For the Sliders
- 12 hawaiian rolls
- 8 ounces chicken ham (thinly sliced)
- 4 ounces provolone cheese (sliced)
- 3 ounces thinly sliced turkey pepperoni
- 3 ounces thinly sliced turkey slices
For the Garlic Parmesan Glaze
- 2 tablespoons butter
- 2 tablespoons grated parmesan
- 1/2 teaspoon garlic powder
- 1/4 teaspoon salt
For the Grinder Salad
- 8 ounces shredded lettuce
- 1/2 cup diced tomato
- 1/2 cup sliced pepperoncini peppers
- 1/4 cup mayonnaise
- 1 tablespoon apple cider vinegar
- 1 teaspoon Italian seasoning
- 1/2 teaspoon salt
- 1/2 teaspoon pepper
- 1/2 teaspoon garlic powder
Variations
One of the best parts about these sliders is their flexibility! You can easily switch up ingredients to suit your taste or dietary needs.
- Swap the protein: Try using grilled chicken or roasted vegetables for a vegetarian version.
- Change the cheese: Mozzarella or even a spicy pepper jack can add a delightful twist.
- Add some heat: Include jalapeños or drizzle with hot honey for an extra kick.
- Go vegan: Use plant-based deli slices and dairy-free cheese to create a crowd-pleasing vegan option.
How to Make Italian Grinder Sliders
Step 1: Preheat Your Oven
Start by preheating your oven to 350˚F (175˚C). This ensures that your sliders bake evenly and get that beautiful golden brown color.
Step 2: Prepare the Rolls
Carefully cut the hawaiian rolls horizontally and lay the bottoms in a baking dish. This creates the perfect base for all those delicious layers of flavor!
Step 3: Build Your Slider Layers
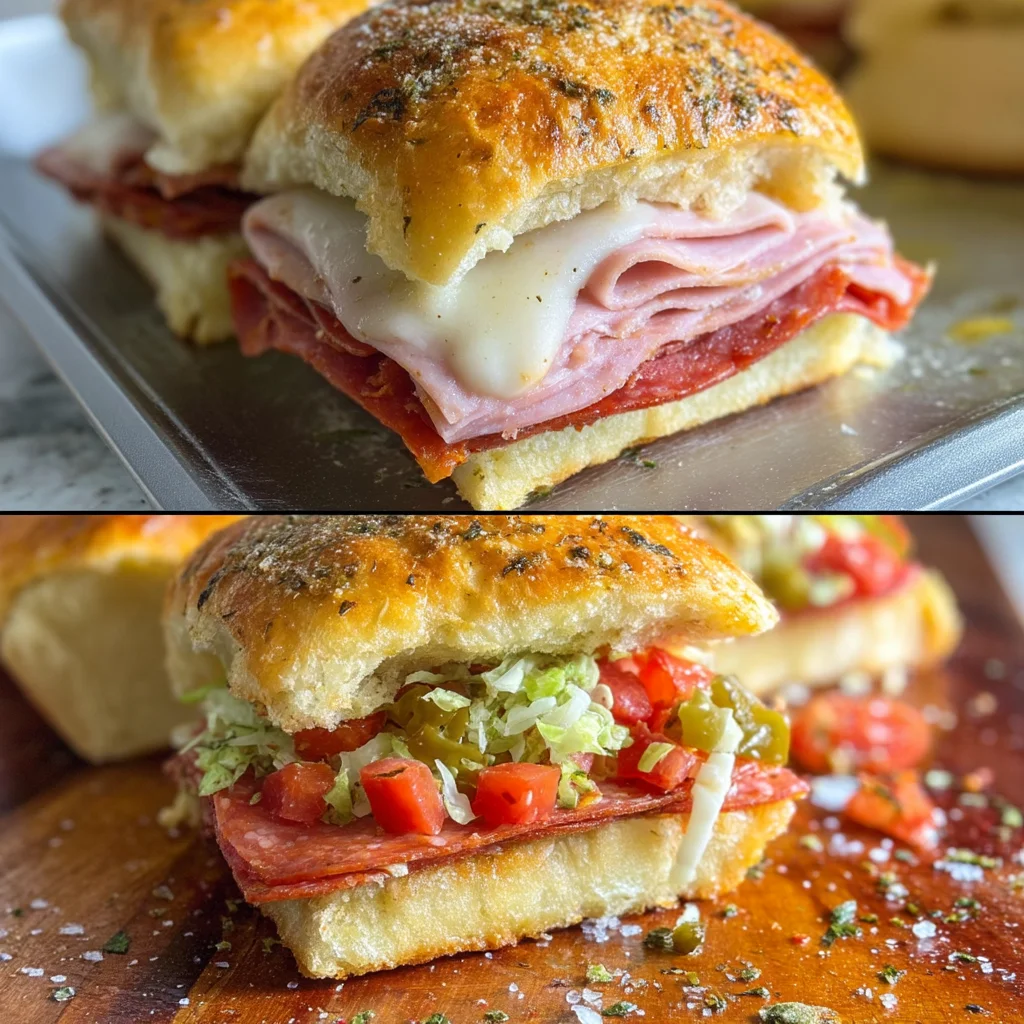
Layer provolone cheese on top of the bread, followed by chicken ham, turkey pepperoni, and turkey slices. Don’t forget to place the tops back on before cutting through each slider — this makes them easier to handle once baked.
Step 4: Add the Garlic Parmesan Glaze
In a small bowl, combine melted butter, grated parmesan, garlic powder, and salt. Spread this flavorful mixture generously over the tops of your sliders. This glaze adds an irresistible crunch as they bake.
Step 5: Bake Until Golden
Pop your baking dish into the oven and let it bake for about 15-20 minutes. Keep an eye out until the cheese has melted beautifully and the tops are golden brown — this is when they become truly irresistible!
Step 6: Prepare the Grinder Salad
While those sliders are baking away, whisk together mayonnaise, apple cider vinegar, Italian seasoning, salt, pepper, and garlic powder in a bowl. Toss in shredded lettuce, diced tomatoes, and sliced pepperoncini peppers. This fresh salad adds both crunch and zing!
Step 7: Assemble & Serve
Once your sliders are out of the oven and slightly cooled, remove their tops gently. Layer on that vibrant grinder salad before placing the tops back on. Serve immediately while they’re warm and melty — enjoy every bite!
Pro Tips for Making Italian Grinder Sliders
Making Italian Grinder Sliders is a breeze with these handy tips to elevate your sliders to the next level!
-
Use Fresh Ingredients: Fresh deli meats and produce enhance the flavor of your sliders, ensuring every bite is delicious and satisfying.
-
Adjust the Seasoning: Feel free to tweak the garlic powder and Italian seasoning to match your taste preferences. A little extra spice can add an exciting kick!
-
Toast the Rolls Slightly: Before assembling, lightly toast the inside of the rolls. This prevents them from becoming soggy and gives a pleasant crunch.
-
Experiment with Cheeses: While provolone is fantastic, mixing in other cheeses like mozzarella or fontina can create a delightful blend of flavors.
-
Make Ahead for Convenience: Assemble the sliders a few hours in advance and refrigerate them until you’re ready to bake. This will save time, especially for gatherings!
How to Serve Italian Grinder Sliders
Presenting Italian Grinder Sliders can be as fun as eating them! Here are some ideas to make your dish visually appealing and enjoyable.
Garnishes
- Fresh Herbs: Sprinkle chopped parsley or basil on top for a pop of color and fresh flavor.
- Parmesan Shavings: Add a few shavings of parmesan cheese on top just before serving for an extra touch of elegance.
Side Dishes
- Italian Pasta Salad: A refreshing mix of pasta, cherry tomatoes, olives, and Italian dressing complements the rich flavors of the sliders perfectly.
- Vegetable Platter: Crisp carrots, celery sticks, and bell pepper slices with hummus provide a crunchy contrast that balances the meal.
- Sweet Potato Fries: Baked sweet potato fries offer a healthier alternative to traditional fries while adding a hint of sweetness to your plate.
- Roasted Brussels Sprouts: Seasoned roasted Brussels sprouts bring earthy flavors that pair wonderfully with the savory sliders.
Make Ahead and Storage
Italian Grinder Sliders are a fantastic option for meal prep, allowing you to enjoy delicious flavors throughout the week without spending too much time in the kitchen.
Storing Leftovers
- Place any leftover sliders in an airtight container.
- Store them in the refrigerator for up to 3 days.
- Reassemble the sliders before serving if they become soggy.
Freezing
- Wrap individual sliders tightly in plastic wrap or aluminum foil.
- Place them in a freezer-safe bag or container.
- Freeze for up to 2 months for optimal freshness.
Reheating
- Preheat your oven to 350°F (175°C).
- Unwrap the sliders and place them on a baking sheet.
- Heat for about 10-15 minutes, until warmed through and crispy.
FAQs
Can I make Italian Grinder Sliders ahead of time?
Absolutely! You can prepare the sliders in advance and store them in the refrigerator until you’re ready to bake. This makes them perfect for parties or meal prep.
What types of meat can I use in Italian Grinder Sliders?
Feel free to customize your Italian Grinder Sliders with different deli meats like chicken, turkey, or even vegetarian options. Just ensure that your choices align with your dietary preferences!
How should I serve Italian Grinder Sliders?
These sliders are best served warm straight from the oven, topped with fresh grinder salad. They make a delightful appetizer or main dish at any gathering.
Can I freeze Italian Grinder Sliders?
Yes! You can freeze assembled but unbaked sliders. Just be sure to wrap them well, and bake them directly from frozen, adding extra time as needed.
Final Thoughts
I hope you enjoy making these Italian Grinder Sliders as much as I do! They’re not just delicious but also versatile enough to suit various tastes. Whether it’s a family dinner or a game day snack, these sliders are sure to impress. Happy cooking, and don’t forget to share your creations!
Italian Grinder Sliders

Italian Grinder Sliders are the ultimate crowd-pleaser, combining the warmth and comfort of cheesy, savory layers all nestled between fluffy Hawaiian rolls. This simple yet satisfying recipe is perfect for any occasion—be it a family gathering, game day, or a cozy weeknight dinner. The sliders are packed with delicious chicken, turkey pepperoni, and provolone cheese, topped with a flavorful garlic parmesan glaze that creates an irresistible golden crust. Add a refreshing grinder salad for extra crunch and zing, making these sliders not just a meal but an experience to be shared. Whip them up in just 30 minutes and watch as they disappear from the platter!
- Prep Time: 10 minutes
- Cook Time: 20 minutes
- Total Time: 30 minutes
- Yield: Serves 12 sliders 1x
- Category: Appetizer
- Method: Baking
- Cuisine: Italian
Ingredients
- 12 Hawaiian rolls
- 8 ounces thinly sliced chicken
- 4 ounces provolone cheese, sliced
- 3 ounces thinly sliced turkey pepperoni
- 3 ounces thinly sliced turkey
- 2 tablespoons butter
- 2 tablespoons grated parmesan
- Shredded lettuce, diced tomatoes, sliced pepperoncini peppers
- 1/4 teaspoon salt
- 1/2 teaspoon garlic powder
- 1 tablespoon apple cider vinegar
- 1 teaspoon Italian seasoning
- 1/2 teaspoon pepper
Instructions
- Preheat your oven to 350°F (175°C).
- Cut the Hawaiian rolls horizontally and place the bottoms in a baking dish.
- Layer provolone cheese, chicken, turkey pepperoni, and turkey on the rolls; replace tops.
- In a bowl, mix melted butter, parmesan, garlic powder, and salt; spread over the slider tops.
- Bake for 15-20 minutes until golden brown and cheese is melted.
- While baking, prepare grinder salad with mayonnaise, apple cider vinegar, Italian seasoning, shredded lettuce, diced tomatoes, and sliced peppers.
- Once baked, remove tops gently to add grinder salad before serving warm.
Nutrition
- Serving Size: 1 slider (80g)
- Calories: 240
- Sugar: 2g
- Sodium: 580mg
- Fat: 12g
- Saturated Fat: 6g
- Unsaturated Fat: 5g
- Trans Fat: 0g
- Carbohydrates: 24g
- Fiber: 1g
- Protein: 10g
- Cholesterol: 40mg



Leave a Comment