If you’re looking for a fun and delicious treat to celebrate Easter, these Peanut Butter Easter Eggs are sure to delight everyone! Inspired by everyone’s favorite candy, this homemade version is not only easy to make, but it also features wholesome ingredients that you can feel good about. Whether you’re hosting a family gathering or just want to add some festive flair to your dessert table, these little treats will have everyone smiling and reaching for seconds.
What makes these Peanut Butter Easter Eggs truly special is how they remind us of the joys of childhood while still being simple enough for anyone to whip up in their kitchen. Plus, they’re perfect for sharing with friends or surprising your loved ones during the holiday season!
Why You’ll Love This Recipe
- Simple Preparation: With just a handful of ingredients, you can create a delightful treat that looks as good as it tastes.
- Family-Friendly Fun: Kids will love helping shape the eggs and decorating them with speckles—it’s a great way to spend quality time together!
- Customizable Flavors: Feel free to mix up the colors or try different nut butters to suit your taste.
- Make-Ahead Convenience: These treats store well in the fridge, so you can prepare them ahead of time for gatherings.
- Naturally Sweetened Goodness: Made with maple syrup and natural peanut butter, they offer a healthier alternative to store-bought candy.
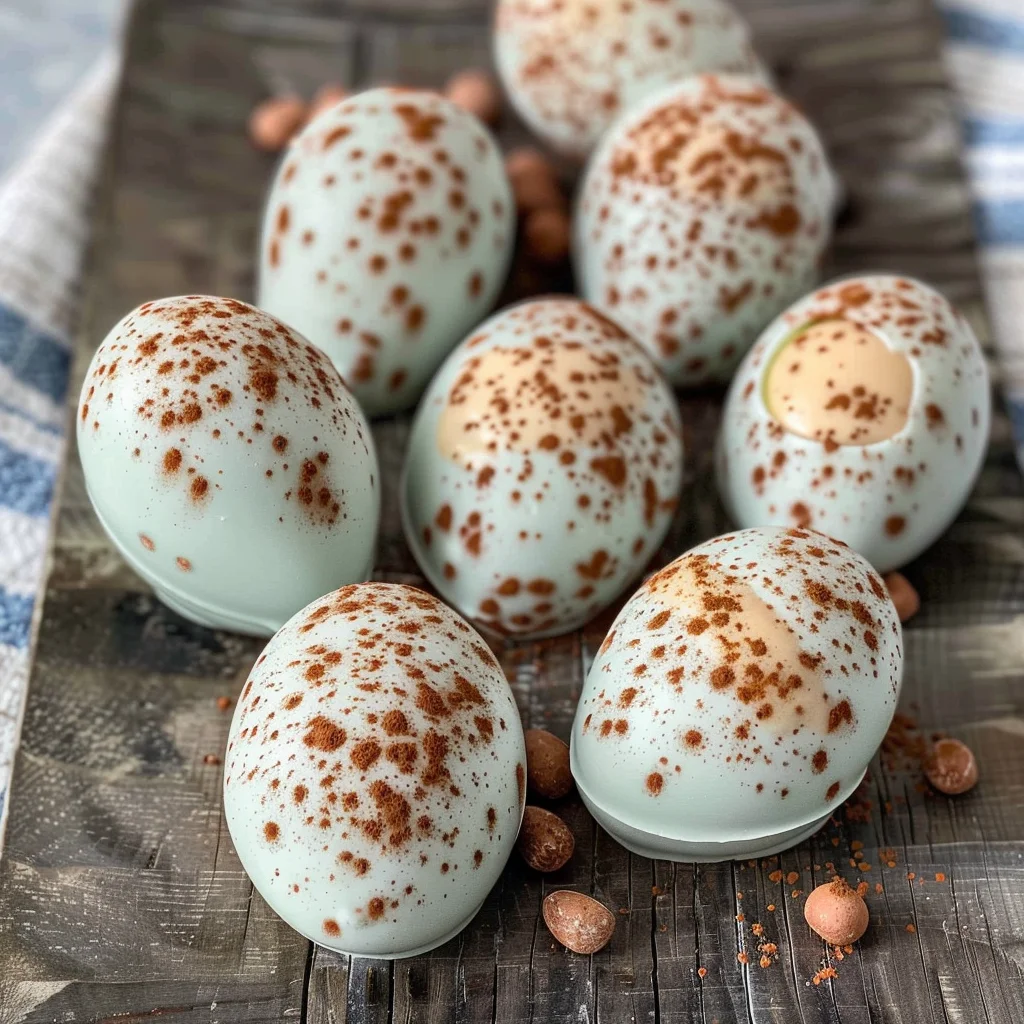
Ingredients You’ll Need
You’ll find that these ingredients are simple and wholesome, making your preparation process straightforward and enjoyable. Gather these items from your pantry and local grocery store to get started on your delightful Peanut Butter Easter Eggs!
For the Filling:
- 1 1/4 cup natural, runny peanut butter (no sugar added)
- 1/4 cup maple syrup
- 1/4 cup powdered sugar
- 1/3 cup almond flour
- 1/2 teaspoon vanilla extract
- Pinch of salt
For the Coating:
- 8 ounces white chocolate melting wafers (we use Ghirardelli brand)
- 2 teaspoons coconut oil
- 1/2 teaspoon blue spirulina + 1/4 teaspoon matcha powder (or use a 2:1 ratio of any blue and green food dye)
For the Speckles:
- 1 teaspoon cocoa powder
- 1 tablespoon water
Variations
This recipe is wonderfully flexible, allowing you to explore different flavors and presentations. Here are some fun ideas to customize your Peanut Butter Easter Eggs:
- Swap the Chocolate: Try using dark or milk chocolate instead of white for a richer flavor!
- Add Crunch: Mix in some chopped nuts or crispy rice cereal into the peanut butter filling for added texture.
- Experiment with Colors: Use various natural food dyes or flavor extracts like mint or orange for a unique twist.
- Go Vegan: Substitute white chocolate with dairy-free options and ensure all other ingredients are plant-based for an inclusive treat.
How to Make Peanut Butter Easter Eggs
Step 1: Prepare the Filling
In a mixing bowl, beat together the peanut butter, maple syrup, powdered sugar, almond flour, vanilla extract, and salt until everything is well combined. This step is crucial because it creates that creamy filling that will mimic traditional candy but with much better ingredients!
Step 2: Shape the Eggs
Portion out the peanut butter filling into 2-tablespoon portions. Roll each into a ball using your hands before shaping them into ovals—this egg-like form is what makes these treats festive! Once shaped, place them on a parchment paper-lined baking sheet and freeze while you prepare the coating.
Step 3: Make Your Coating
In a small bowl, whisk together cocoa powder and water; set aside. Then, melt the white chocolate along with coconut oil in a microwave-safe bowl. Microwaving in intervals helps prevent burning. Whisk in spirulina and matcha until you achieve your desired colors—this is where you can really get creative!
Step 4: Coat Your Eggs
Once your eggs are semi-frozen (this helps them hold their shape), use a toothpick to dip each egg into the white chocolate coating. Let any excess drip off before placing them back on parchment paper. It’s important to remove the toothpick while it’s still soft to avoid cracking.
Step 5: Add Speckles
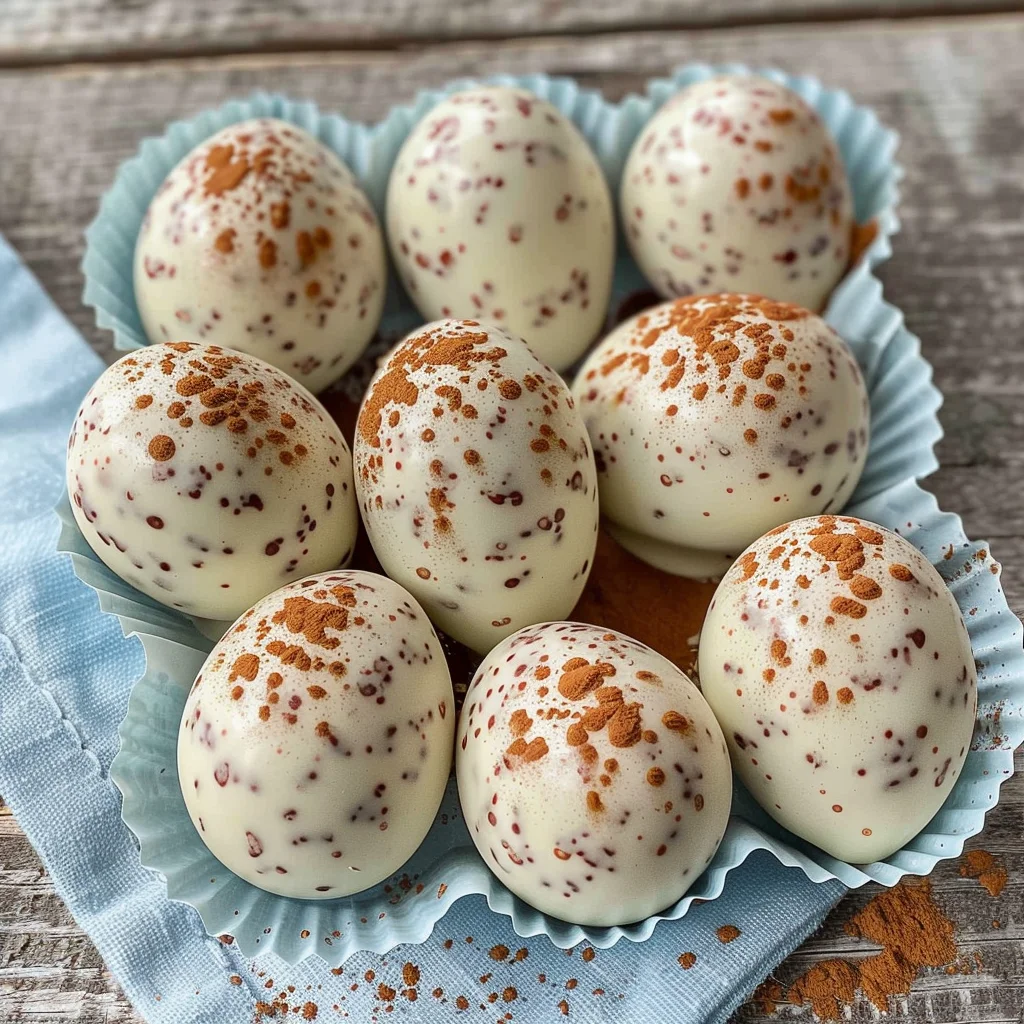
To create lovely speckles reminiscent of robin’s eggs, dip a pastry brush into your cocoa mixture and flick it above each egg. This adds an artistic touch that brings out their charm! Just be prepared for some mess—it’s all part of the fun! Afterward, refrigerate until everything firms up nicely.
Enjoy making these delightful Peanut Butter Easter Eggs—they’re bound to become a new favorite tradition!
Pro Tips for Making Peanut Butter Easter Eggs
Creating the perfect Peanut Butter Easter Eggs is all about attention to detail and a few handy tricks. Here are some pro tips to help you achieve the best results:
-
Use Room Temperature Ingredients: Ensuring that your peanut butter and maple syrup are at room temperature will make them easier to mix, resulting in a smoother filling.
-
Freeze for Easy Coating: Freezing the shaped eggs before dipping helps the chocolate coating set quickly without pooling, giving you a clean finish.
-
Don’t Overheat the Chocolate: Melting the white chocolate in short intervals prevents it from burning. Stirring frequently ensures even melting and a glossy appearance.
-
Experiment with Colors: Feel free to adjust the amounts of spirulina and matcha to create your desired shade. This adds a personal touch to your Easter treats!
-
Flick with Care: When creating speckles, practice flicking gently to avoid over-splashing. A light hand will give you beautiful, delicate specks that look professional!
How to Serve Peanut Butter Easter Eggs
Serving these delightful Peanut Butter Easter Eggs can be as fun as making them! Here are some creative ways to present your sweet treats.
Garnishes
- Chopped Nuts: Sprinkle finely chopped almonds or peanuts on top for an added crunch and flavor contrast.
- Coconut Flakes: Toasted coconut flakes can add a tropical twist and enhance the visual appeal of your eggs.
Side Dishes
- Fruit Salad: A refreshing fruit salad featuring seasonal berries complements the richness of the peanut butter eggs perfectly.
- Dark Chocolate Drizzled Strawberries: These luscious berries provide a beautiful contrast in flavors and colors, enhancing your dessert table.
- Carrot Sticks with Hummus: For a healthier option, serve crunchy carrot sticks with hummus; they balance out the sweetness while keeping things festive.
- Mini Muffins: Offer an assortment of mini muffins (like banana or blueberry) for an extra treat that guests can enjoy alongside their peanut butter eggs.
Make Ahead and Storage
This Peanut Butter Easter Eggs recipe is perfect for meal prep, allowing you to enjoy these delightful treats whenever the craving strikes!
Storing Leftovers
- Store any leftover Peanut Butter Easter Eggs in an airtight container.
- Keep them in the refrigerator for up to one week.
- To maintain freshness, separate layers with parchment paper if stacking.
Freezing
- Place the eggs on a parchment-lined baking sheet and freeze until solid.
- Transfer the eggs to a freezer-safe bag or container, separating layers with parchment paper.
- They can be frozen for up to three months. Just thaw in the refrigerator before enjoying.
Reheating
- These treats are best enjoyed cold or at room temperature. Simply remove from the fridge or freezer and let sit for a few minutes before serving.
FAQs
Can I use crunchy peanut butter for Peanut Butter Easter Eggs?
Absolutely! Crunchy peanut butter will add a delightful texture to your Easter eggs. Just ensure it’s natural with no added sugars.
How long do Peanut Butter Easter Eggs last?
When stored properly in the refrigerator, Peanut Butter Easter Eggs will last up to one week. If frozen, they can stay fresh for about three months.
Are Peanut Butter Easter Eggs gluten-free?
Yes! This recipe uses almond flour instead of regular flour, making it a gluten-free treat that everyone can enjoy.
Final Thoughts
I hope you find joy in making these delicious Peanut Butter Easter Eggs! They are not only fun to create but also a delightful treat that brings smiles all around. Enjoy this special recipe with family and friends, and don’t hesitate to share your creations!
Peanut Butter Easter Eggs
Get ready to delight your taste buds with these homemade Peanut Butter Easter Eggs! Perfect for celebrating the holiday, these treats combine the nostalgic flavors of childhood with wholesome ingredients you can feel good about. The creamy, naturally sweetened peanut butter filling is encased in a vibrant chocolate coating, making them not only delicious but visually appealing as well. Ideal for sharing at family gatherings or surprising loved ones, these festive eggs are simple to prepare and fun to customize. With various options for colors and flavors, you’ll have a delightful treat that everyone will adore—perfect for any occasion!
- Prep Time: 30 minutes
- Cook Time: None
- Total Time: 0 hours
- Yield: Approximately 12 servings 1x
- Category: Dessert
- Method: No cooking required
- Cuisine: American
Ingredients
- 1 1/4 cup natural, runny peanut butter (no sugar added)
- 1/4 cup maple syrup
- 1/4 cup powdered sugar
- 1/3 cup almond flour
- 1/2 teaspoon vanilla extract
- Pinch of salt
- 8 ounces white chocolate melting wafers
- 2 teaspoons coconut oil
- 1/2 teaspoon blue spirulina
- 1/4 teaspoon matcha powder
- 1 teaspoon cocoa powder
- 1 tablespoon water
Instructions
- In a bowl, combine peanut butter, maple syrup, powdered sugar, almond flour, vanilla extract, and salt until smooth.
- Shape into egg-like ovals (about 2 tablespoons each) and freeze on a parchment-lined sheet.
- Melt white chocolate with coconut oil in intervals; stir in spirulina and matcha for color.
- Dip each egg into the chocolate coating and place back on parchment.
- Flick cocoa mixture for speckles; refrigerate until firm.
Nutrition
- Serving Size: 1 serving
- Calories: 180
- Sugar: 9g
- Sodium: 25mg
- Fat: 12g
- Saturated Fat: 5g
- Unsaturated Fat: 6g
- Trans Fat: 0g
- Carbohydrates: 14g
- Fiber: 2g
- Protein: 4g
- Cholesterol: 0mg
Leave a Comment